How to Setup an E-commerce Website with Shopify in 6 Steps
Since you seem keen on reading more in this title, I assume that you have heard about Shopify a platform that helps you build and manage E-commerce websites with incredible ease. Though it looks like creating your own custom e-commerce website happens within minutes, the big question – How to Build E-commerce website with Shopify, always sits at the back of your head. Well, here’s how.
By the end of this quick tutorial on how to make an e-commerce website with Shopify, you’ll be well equipped with all the info you need to get started with your first e-commerce website in a matter of half an hour and 6 simple steps.
And if you do not yet have a thought about getting into e-commerce anytime soon, you got to know that e-commerce is one of the most lucrative businesses that can happen online. With more and more people relying on the internet for basic shopping purposes, eCommerce can turn into a gold mine if played skillfully.
But still, there are quite a few players in this field lately. Why so?
Because, setting up an e-commerce website takes a good deal of skill, time and investment in terms to hiring a web designer, website developer, customer care setup, and so on. But that isn’t the scenario anymore.
With CMSs (content marketing system) like Shopify, the tables are now turned. With over 30,000 stores built on Shopify, it sure is a great way to create an e-commerce website. You no more have to be acquainted with complicated coding or designing; and still can get yourself a striking e-commerce website.
No, not just that!
Shopify makes its remarkably easy to manage your so built e-commerce website from shopping carts to SEO, from payment gateways to tracking sales and not just setup an online store. All this with no hassle, just hustle.
Enough said. Lets see how all of this magic actually happens.
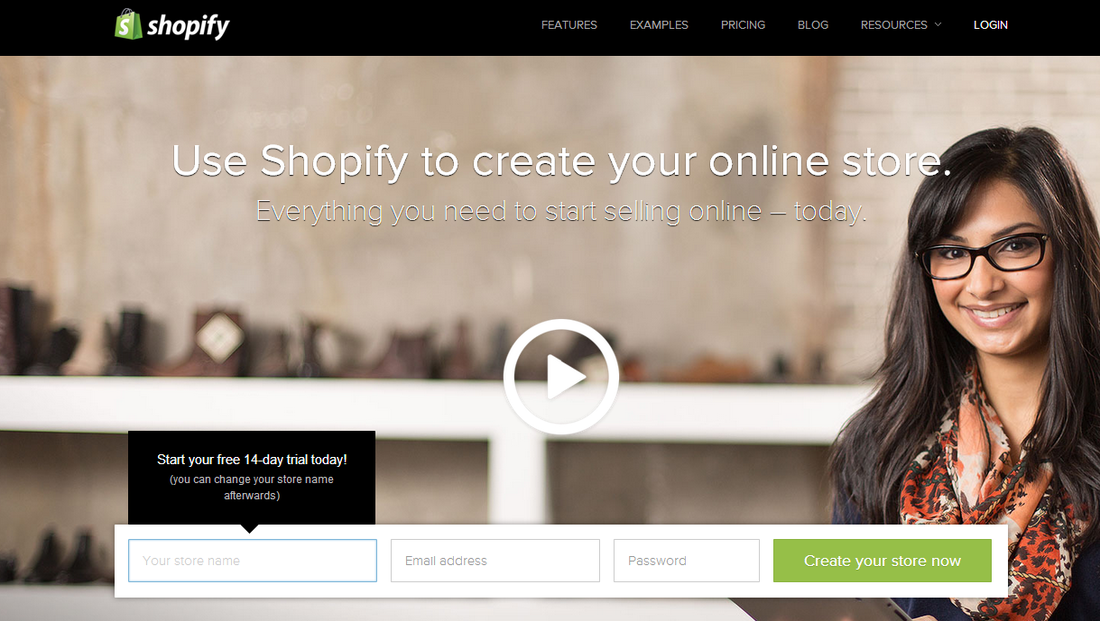
The best part about Shopify is that it provides a 2 weeks (14 days) free trail with no credit card credentials required; i.e., with no initial payment. Also, shopify would give you a fully hosted e-commerce store. So you needn’t worry about finding a reliable host or shed extra bucks.
No, not just that!
Shopify makes its remarkably easy to manage your so built e-commerce website from shopping carts to SEO, from payment gateways to tracking sales and not just setup an online store. All this with no hassle, just hustle.
Enough said. Lets see how all of this magic actually happens.
The best part about Shopify is that it provides a 2 weeks (14 days) free trail with no credit card credentials required; i.e., with no initial payment. Also, shopify would give you a fully hosted e-commerce store. So you needn’t worry about finding a reliable host or shed extra bucks.
6 steps to Build an E-commerce website with Shopify
Step 1: Getting started with Shopify
- Start off by creating an account with Shopify and fill in the details asked for. You can kick off with the free trail account or pick up any1 of the 4 available pricing plans.
- Once done, you’d be directed to you store’s dashboard. The screen offers you a step by step tutorial. Since this tutorial will suffice, just go ahead and click ‘skip tutorial’ link right at the bottom of the screen.
- The screen that then appears is a gist of you traffic and activity feed. On the left sidebar you get all the important tabs. Click on ‘settings’ on the sidebar to name the store, add a title and description for the webpage of your store, physical store address and e-mail address.
- Also, setup time zone, currency, order code format and Google Analytics for your store in the same page.
Step 2: Designing you online store on Shopify
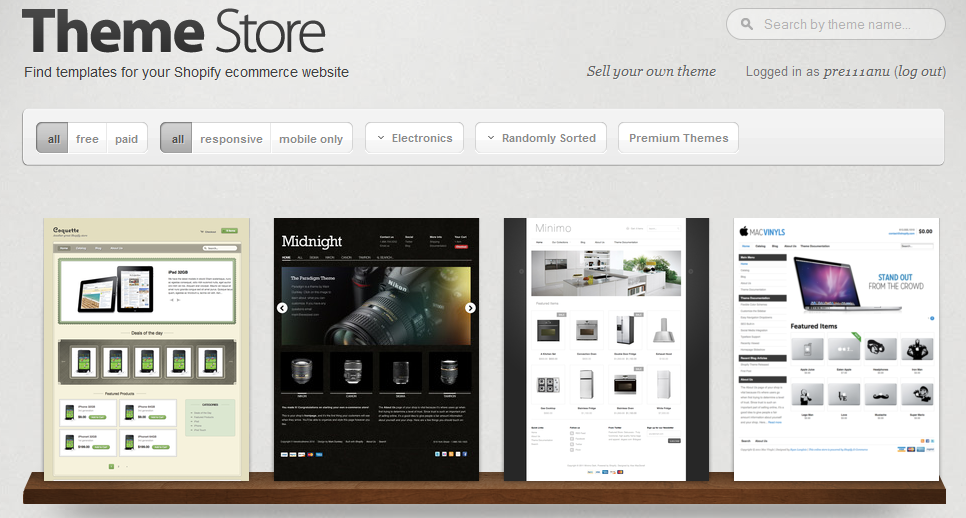
Shopify makes designing and customizing you e-store a breeze. You can choose from a range of free or paid store templates and further play around with the chosen theme through an intuitive design interface. The themes from the theme store come built with social sharing buttons, subscription forms, blog layout, etc.
- Go back to your dashboard by clicking ‘<- back to admin’ and select ‘Themes’ from the sidebar.
- Click the green ‘Visit the Theme Store’ button located at the top right of the screen to pick up a free or paid theme from the store.
- Once you find a good theme, click the ‘Get theme’ button followed by the ‘Install and publish as my shop’s main theme’.
- Upon installation, go back to the ‘Themes’ tab on the sidebar of the dashboard to see the installed theme.
- Go on and click ‘Theme setting’ link against your theme name to add a logo, customize the store background, add an image carrousel, newsletter, manage home page, manage carts design, and many more.
Step 3: Adding products to your e- commerce store
- On the dashboard’s sidebar, click ‘Products’, and then click ‘add a product’ button.
- In the following page, add - product title, description, price, weight and other product related details.
- Upload an image of the product by hitting the ‘Browse’ button.
- Optimize the product for search by adding relevant product tags, page title, page description and custom product page URL.
- Save the changes.
- Likewise, add all your products.
- To delete a product, go to the products tab to see the list of uploaded products. Check the product you want to delete and hit ‘delete selected products’ from the ‘bulk actions’ dropdown menu.
Step 4: Setting Payment options in you online store
Shopify lets you setup a full fledged checkout that provides multiple payment options ( PayPal, Credit cards, cash on delivery, and more); lets you decide if the buyer can transact as a guest or have a mandatory a/c with you; add privacy and refund policies; and set a checkout page language.
Check the below video for a quick checkout setup.
- From the dashboard’s sidebar select ‘settings’
- On settings sidebar select ‘Checkout’.
- Here is where you can configure the above mentioned settings.
Check the below video for a quick checkout setup.
Step 5: Managing your online store with Shopify
A lot goes into managing an online e-commerce store. Shopify helps take forward all managerial tasks from one place.
Arrange discounts on you online store
Shopify lets you
Shpoify has got amazingly handy apps in its ‘App store’ which can help you breath with ease. There are paid and free apps for almost all e-commerce related stuff. Just name a category and you have apps for it; be it shipping, inventory, social sharing, accounting or marketing. Below are some that you better have for an enriched experience.
Arrange discounts on you online store
- From the dashboard’s sidebar select ‘Discounts’.
- Click add a discount to start a fresh discount.
- Under ‘Discount details’ enter a discount code as desired, or simply use the ‘generate code’ button to auto-generate an alpha-numeric discount code/coupon.
- You can then set the usage limit of the code by checking or unchecking the ‘No limit’ checkbox.
- Under ‘Discount Type’ you can choose the kind of discount you’d prefer offering – a % off or a free shipping offer.
- You can then set a time span for the discount to be valid in the ‘Date range’ section of the same page.
Shopify lets you
- Add and delete customers.
- Categorize customers through tags.
- Filter customers based on tags given, location, marketing preference, repeat visits, number of orders placed, amount spent,cancelled orders, account status, etc.
- You can import existing customer roll into your Shopify store if you have migrated from another e-commerce website building platform.
- Furthermore, you can also export you current customer roll as a dot csv file.
- Go to ‘customers’ from the left sidebar of your dashboard and click ‘Add customer’ to add a new clients entry.
- To export or import existing clientele, use the the export and import buttons on the top right of the screen.
- To apply filters, simply select the desired filter from the ‘Filter customer’ dropdown menu next to customer search bar within the ‘customers’ tab.
Shpoify has got amazingly handy apps in its ‘App store’ which can help you breath with ease. There are paid and free apps for almost all e-commerce related stuff. Just name a category and you have apps for it; be it shipping, inventory, social sharing, accounting or marketing. Below are some that you better have for an enriched experience.
- PunchTab – Acknowledge and reward your loyal customers.
- Wigify Affiliate Management – Supercharge your marketing by launching an affiliate program with this free app.
- Chimpifyed – Integrate Shopify with MailChimp to automate and track your e-mail marketing ROI.
- Question Time – Add a FAQ page to your store instantly with lesser efforts.
- Zopim Live Chat – The name says it all I guess.
- GrapeVine Reviews – Allows your customers to review and star rate your products with ease.
- Giftery.me – Integrate a wishlist to every customer’s account.
- UpSell – Push customers towards buying related products by pitching them to the buyer.
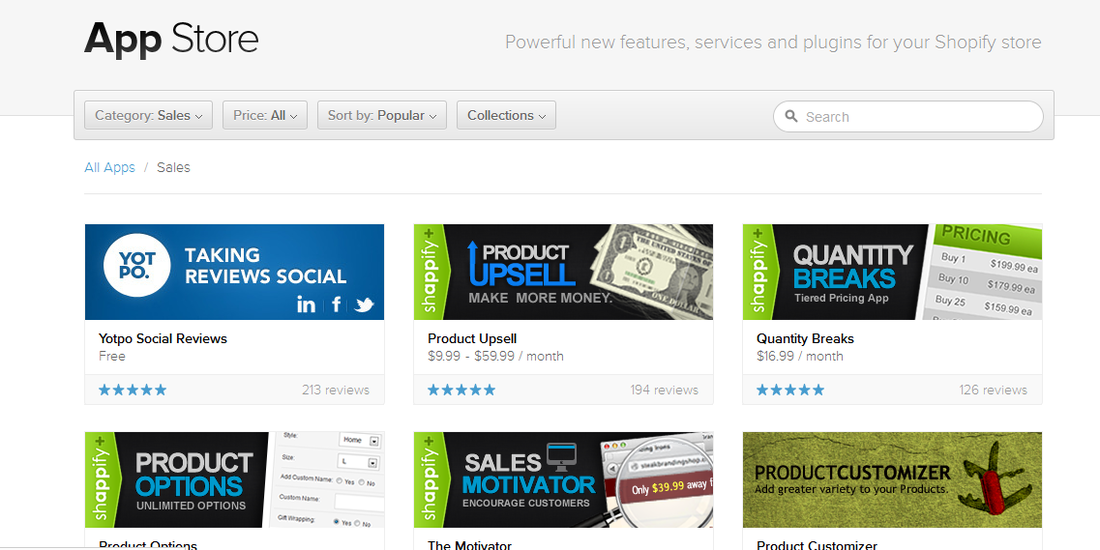
To install these and other apps in you shopify store,
- Go to ‘Apps’ in your dashboard’s sidebar.
- Click ‘Go to App store’.
- Skim through the categories to select an app. Click on the app thumbnail.
- Click ‘Get App’ button.
- And finally hit ‘Install App’ after reading the per-installation notifications.
Step 6 : Adding a Blog to your Online Store in Shopify
Having a blog for your website gives numerous benefits – one being getting closer to your prospects and existing clients and the other being keeping the search engines happy. Shopify realizes this fact and hence helps you in this aspect too.
The blog creator at Shopify is as good as the most loved WordPress editor. I guess this analogy tell you how easy it is to setup a blog for your e-commerce website with Shopify.
To setup a blog for your e-commerce website follow the below steps.
The blog creator at Shopify is as good as the most loved WordPress editor. I guess this analogy tell you how easy it is to setup a blog for your e-commerce website with Shopify.
To setup a blog for your e-commerce website follow the below steps.
- On the dashboard’s sidebar hit ‘Blog Posts’ tab to see a list of posts in your store’s blog.
- Click on a published post’s title to launch the editor, set date, tags, manage comments for the post and configure SEO settings like title tag, description, etc.
- To create a new post click the ‘Add blog post’ button on the top left corner of the ‘Blog posts’ tab screen.
- Click the ‘Manage blogs’ and ‘Manage comments’ buttons on top right corner to add or remove blogs and comments respectively.
- To manage pages on the store, click on ‘Pages’ tab on dashboard’s sidebar. Add a new page through the ‘Add page’ button, or edit existing pages by clicking the page titles to launch the editor.
- To manage the navigation of the site, use the ‘Navigation’ tab on the dashboard.
- Within this page select ‘Footer’ to edit footer links or select ‘Main Menu’ to edit the main navigation of your store.
Once you are done with these 6 steps, go to ‘Account’ under ‘Settings’ tab and select a plan and enter credit card details (you will not be charged until free trial period expires). Then click ‘launch site’ to get your e-commerce website up and running.
Hope this tutorial helps you enough to setup an e-commerce website with Shopify with no much trouble. You can also refer Shopify YouTube channel and the Shopify user manual for further help.
Hope this tutorial helps you enough to setup an e-commerce website with Shopify with no much trouble. You can also refer Shopify YouTube channel and the Shopify user manual for further help.
